Adding a Printer (via IP address)
NOTE: Please be sure that you are using the “BML” wireless network, the "BML Guest" wireless network is internet only, and doesn’t allow access to printers and file servers.
These instructions are for a Mac running OSX (various), some screens may look slightly different on your mac but the fundamental concepts are consistent across OSX.
1. From the Apple Menu, choose System Preferences -> Printers & Scanners
2. Underneath the list of available printers, click on the + sign to add a printer.
- 10.10.15.10 - Purchase Order Printer in Purchasing Dept. (PO forms ONLY)
- 10.10.15.12 - Library Printer (model m601)
- 10.10.15.16 - Front Office B&W Printer (model m601)
- 10.10.15.19 - Computer Lab Printer (model m609dn)
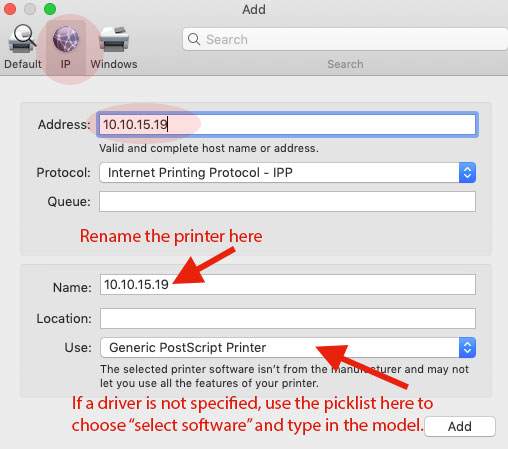
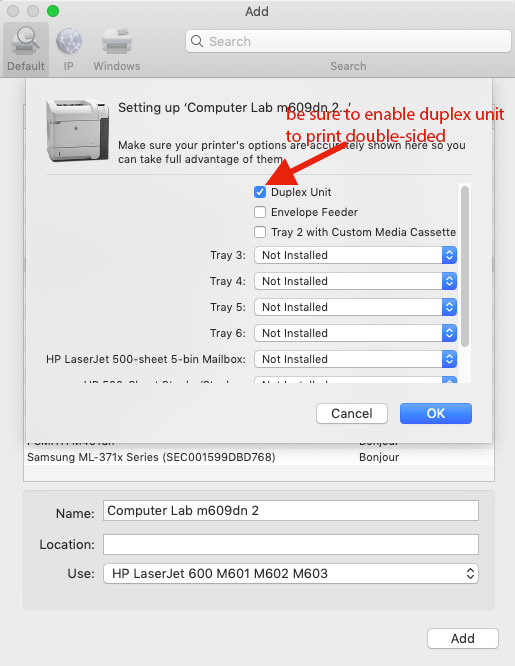
4. Be sure you have the correct driver selected, see screen cap, above, for reference. The printer you added will show up in your list of available printers.
Be sure to enable the duplex option for 2-sided printing, then OK to add the printer.
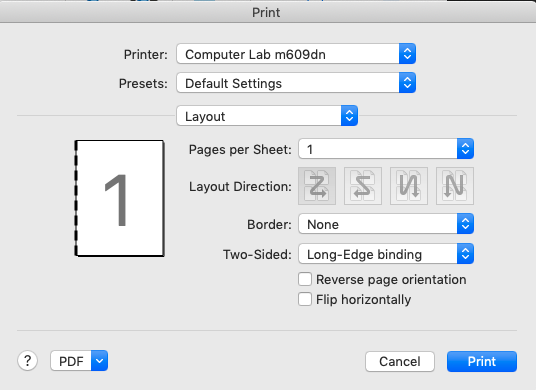
To print 2-sided within an application print dialogue, choose the appropriate printer from your printer list. In the third pick-list choose "Layout", a 2-sided option will appear. Choose "long-edge binding" from the pick-list, then PRINT to send your 2-sided print job to the printer.